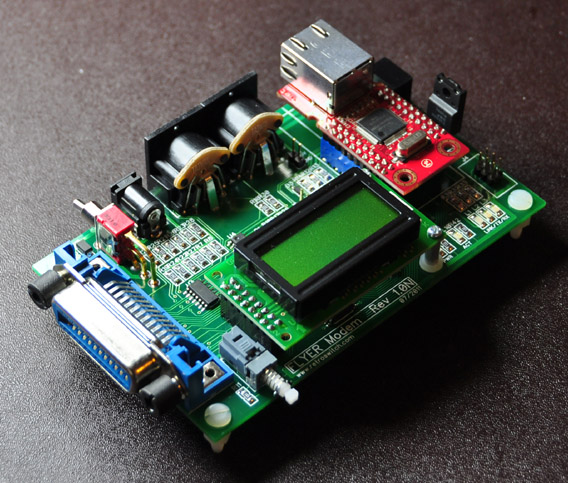
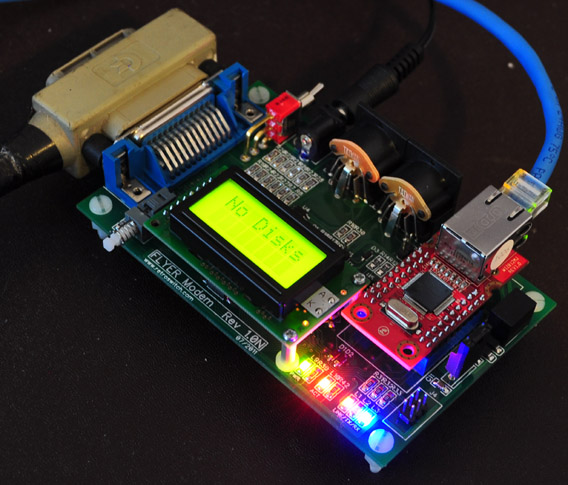
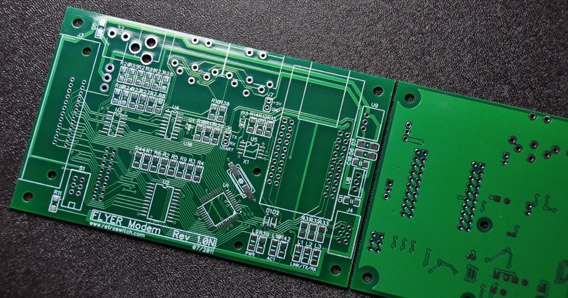
The final board layout will be sent out for manufacture this weekend. I’m sticking with the right angle IEEE-488 connector for the time being since I have quite a few that need to be used. It’s only a minor inconvenience if using short or very heavy IEEE-488 cables.
Firmware should be “production ready” a week or so after I receive the final PCBs, so anyone interested in one of the first units should contact me via the form on this site and I will let you know exact dates as I get them. I will also try to source some of the pricier components from other suppliers in an effort to lower the final cost of the units as much as possible.
The rest of this entry will focus on a few random examples of the Flyer in action. All but the last one were taken while hooked up to my CBM 8032.
This is NOT a comprehensive overview of the device’s feature set. Also note that the firmware is easily upgradeable over the internet and many exciting features are planned for future releases. I enjoy getting feature requests as well!
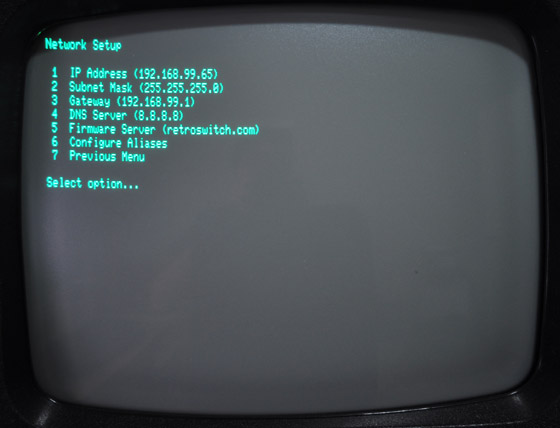
This is the network setup page of the bundled CONFIG program. It’s not fancy, but that’s because it was intended to work across a wide variety of Commodore machines 🙂
I should clarify that *no* software needs to be loaded on the host machine in order to use the device in any way. This is one page of the configuration program that is bundled with the Flyer. The bundled software is stored in the firmware itself and is therefore updated with each firmware update. It is exposed via a read-only secondary virtual drive unit which doesn’t support the full feature set of the main virtual drive. In fact, it really only supports returning directory contents (e.g. load”$1:c*”,10) and loading programs (e.g. load”1:config”,10).
The CONFIG program itself is a very simple BASIC program that retrieves and updates settings on the Flyer via simple IO commands, which can also be done manually if desired (open7,7,15,”config:ip=192… etc).
You may notice there is no mention of DHCP, as it’s not currently supported. However, I hope to have an implementation working before initial release.
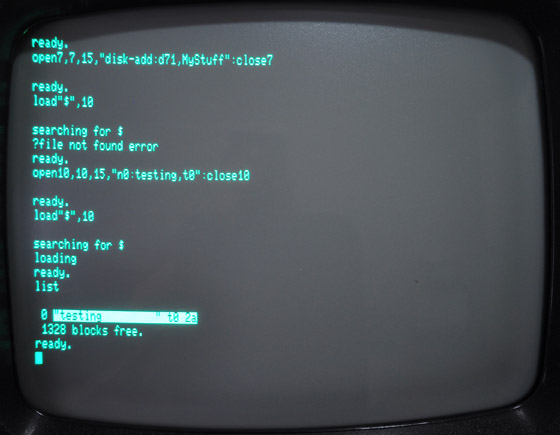
Here is an example of adding a new disk to the local store/cache on the Flyer. Higher level device management is performed via the control peripheral at address #7. The virtual drive can be assigned address 8 through 15. In these examples, my virtual drive is assigned address 10.
First a new D71 disk is added via the disk-add command. The “MyStuff” label is used to identify the disk on the LCD display and when transferring the disk to/from “the cloud”. Think of it as the label sticker on the outside of a real diskette.
After the disk is added, it still must be formatted (as demonstrated by the failed directory load). This is done using the virtual drive using standard syntax.
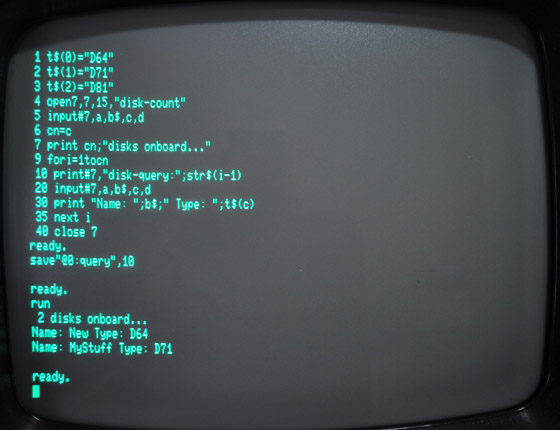
This is just a very simple BASIC program which fetches some information from the control device about disks stored on the Flyer.
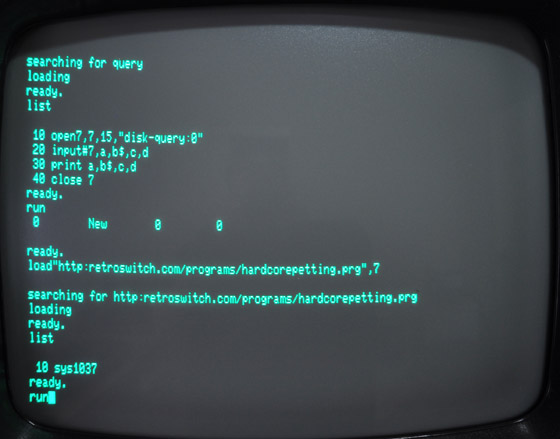
Now for some of the cooler features! Here we’re loading a program from teh internets directly into the machine, just as if it was your own personal disk drive 🙂
Loading a disk image into the onboard cache requires only one additional argument. For example:
load"http:somesite.com/programs/neatstuff.d64,D=Games1",7
This will attempt to reserve space on the Flyer and download neatstuff.d64 into the onboard flash store. Simple checks will verify it matches the known sizes of D64, D71 or D81 images. “Games1” is the label assigned to the new disk.
What happens if we try to load neatstuff.d64 into BASIC memory (we omit the ,D)? I won’t bore anyone here with the specific firmware details, but this would fail before reaching the host machine and the Flyer would merely show an error condition.
“That’s great, but that’s an awful lot of typing” some of you might be thinking. Not shown here are aliases which can be configured and used in place of protocols (or anything else for that matter). For example, A0: might be aliased to HTTP:RETROSWITCH.COM/PROGRAMS/. At that point, we merely have to type load”A0:someprogram.prg”,7. Winning!

In this example, I just wrote a simple PHP script on my local test server which provides a sort of dropbox functionalty to allow me to load AND save programs and disk images to the cloud.
The exposed HTTP protocol allows a decent amount of flexibility when used with the generic data channels (2-14), such as adding POST variables, file data, etc. They are bidirectional based on when the HTTP transaction has occured. In other words, an HTTP channel will be write only until the HTTP transaction has been kicked off via the control device’s command channel. Then the data channel will be read only, and the results from the server can be read back (GET#, etc).
When used with channels 0 or 1, some of this is done automatically in order to work conveniently with LOAD and SAVE.
Is HTTP all that is/will supported? Absolutely not! The exposed TCP protocol is being wrapped up now, and future plans include supporting higher level protocols such as FTP.
In addition to this, a new hybrid protocol is currently in the works to make it very easy to browse and share disk and program collections across multiple sites which support this abstraction. Yes, that’s kinda vague, but I think it’s gonna be pretty cool, and it will give me something to write about in an upcoming blog post 🙂


